Where Do Roof Leaks Usually Start—And How Do You Fix Each One?
Key Takeaways
- Roof leaks often start near chimneys, flashing, skylights, and roof valleys due to wear or gaps.
- Damaged or missing shingles expose the roof deck, leading to leaks if not replaced promptly.
- Flashing and seal issues are top causes of leaks—repairing or replacing them restores protection.
- Delaying leak repairs risks structural damage, mold, and higher long-term repair expenses.
- Regular inspections and hiring trusted contractors like Jackson Contracting prevent future leaks.
Roof leaks most often start at vulnerable spots where different roof components meet, such as around chimneys, skylights, valleys, and flashing. These areas are prone to wear, cracks, and gaps that allow water to seep in, causing leaks. Identifying these common trouble spots early is key to addressing the problem before it leads to more extensive damage inside your home.
You can spot leaks by checking for water stains on ceilings, damp attic areas, or missing shingles after storms. Fixing a leak usually involves repairing or replacing damaged flashing, sealing cracks, or patching shingles with the help of a roof repair contractor in Indianapolis. Understanding where leaks typically begin helps you take focused action to protect your roof and avoid costly repairs.
Where Roof Leaks Commonly Start
Chimneys and Roof Penetrations
Chimneys and other roof penetrations, such as vents and skylights, are frequent leak sources. Water can seep through cracks in the chimney structure or through damaged mortar joints. The flashing around chimneys is especially prone to deterioration, creating gaps where moisture enters.
If the flashing is bent, loose, or missing, you’ll often find leaks directly below the chimney inside your home. Regularly inspect the sealant and replace or repair flashing to keep these areas watertight.
Missing or Damaged Shingles
Shingles protect your roof from water, but they can become damaged by wind, hail, or age. Missing shingles expose underlying roofing materials, allowing water to reach your roof deck. Cracked, curled, or brittle shingles also fail to shield the roof properly.
Check your roof after storms or every few years for signs of broken or loose shingles. Replacing damaged shingles promptly prevents water from pooling and reduces the chance of leaks spreading.

Valleys and Roof Intersections
Valleys are where two roof planes meet, creating channels for rainwater to flow off. These zones experience more water and debris buildup, making them especially vulnerable to leaks. Even minor damage to the metal flashing or shingles here can cause water to back up and penetrate your roof.
Keep valleys clear of leaves and debris. When inspecting your roof, watch for cracked flashing or worn shingles in these areas, as small issues can develop into serious leaks.
Flashing and Seals
Flashing is a thin metal strip installed to direct water away from critical roof joints, such as around vents, chimneys, and skylights. Over time, flashing can corrode, lift, or develop gaps, while seals around penetrations can crack or shrink.
You should pay close attention to flashing seams, seals, and any caulking used with them. Maintaining or replacing damaged flashing prevents water from entering hidden areas and causing structural damage.
How to Fix Each Common Roof Leak
Repairing Around Chimneys
Leaks around chimneys often stem from deteriorated flashing or cracked mortar. First, examine the flashing—the metal strip sealing the gap between the chimney and the roof. If damaged or loose, carefully remove old flashing and replace it with new, corrosion-resistant metal like aluminum or galvanized steel.
Use a high-quality roofing sealant to secure the edges and prevent water intrusion. Also, inspect the chimney crown for cracks and seal them with a masonry waterproofing compound.
Ensure proper integration with your roofing material to maintain an effective seal. Jackson Contracting’s repair process emphasizes thorough cleaning before installation to enhance adhesion and prolong the repair.
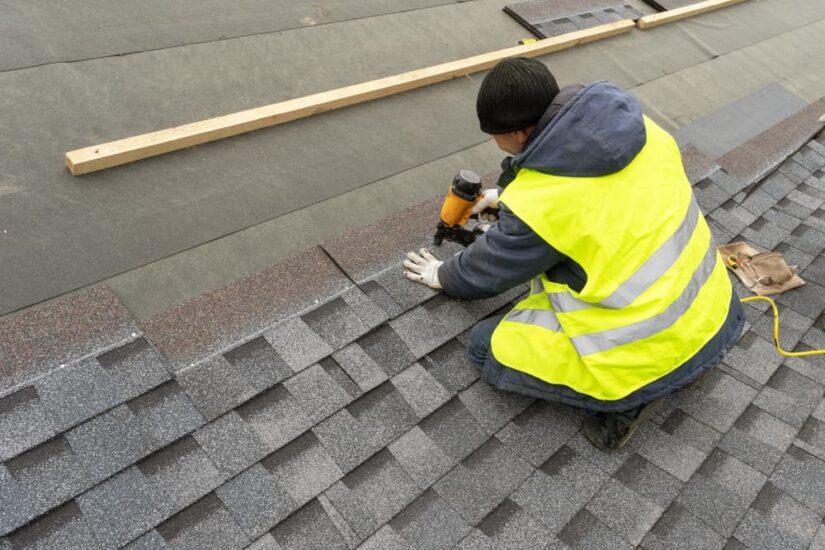
Replacing Shingles
- Damaged or missing shingles are a common leak source. To replace shingles, remove the affected shingles carefully without damaging surrounding pieces.
- Slide new shingles under the overlapping ones, aligning them properly. Use roofing nails to secure the replacement, placing nails just above the adhesive strip to ensure proper sealing.
- Apply roofing cement under the edges to seal gaps and prevent wind or water damage. Asphalt, wood, and metal shingles each require compatible replacement parts, so use the same material type as your existing roof.
- Check manufacturer guidelines for specific installation instructions to avoid mistakes common with DIY shingle replacement.
Fixing Flashing and Seal Issues
Flashing failure occurs around roof vents, skylights, gutters, and joints. If flashing is cracked or bent, replace it to restore the barrier against water.
First, remove the old flashing carefully without disturbing adjacent roofing components. Cut new flashing to size, matching material type and thickness. Slide it under the roof layer above and over the lower layer.
Use roofing sealant to secure seams, paying close attention to corners, where leaks often start. Jackson Contracting stresses finishing the flashing repair with a consistent bead of sealant for long-term water resistance.
For minor seal issues, apply a high-quality polyurethane or silicone sealant designed for roofing to prevent leaks without full replacement.
Addressing Valley Leaks
Roof valleys channel water and are prone to leaks due to their converging design. Problems usually come from damaged valley flashing or buildup of debris causing water backup.
Clear out leaves, dirt, and other debris regularly. If flashing is faulty, remove damaged segments and install new, durable valley flashing, typically made of metal. Overlap flashing pieces properly, securing them with roofing nails and an appropriate sealant at joints and edges. Ensure the flashing sits flush with the roofing material to avoid gaps.
Valley repairs require precision, especially with metal or tile roofs, where improper flashing leads to accelerated water damage. Jackson Contracting advises strict adherence to recommended valley flashing techniques to prevent recurring leaks.
Risks Associated With Delaying Roof Leak Repairs
Structural Damage
When water from a leak penetrates your roof, it can reach underlying materials like wood framing and sheathing. Prolonged moisture exposure weakens these components, causing rot and loss of structural integrity.
This damage can lead to sagging ceilings, compromised load-bearing elements, and even risk of partial collapse in severe cases. Delaying repairs increases the chance that hidden damage worsens, making your home unsafe and more difficult to restore.
You should address leaks promptly to prevent water from spreading beyond the initial entry point. Early repair stops progressive deterioration and protects essential structural supports.
Mold and Indoor Air Quality Issues
Moisture from a leaking roof creates an ideal environment for mold growth. Mold can develop inside walls, ceilings, and attic spaces, often out of sight until health symptoms appear. Exposure to mold spores may cause respiratory problems, allergies, and worsen asthma. Poor indoor air quality due to mold also affects overall home comfort and safety.
Fixing leaks quickly limits moisture buildup and reduces the risk of mold infestations. Waiting too long allows mold to establish itself, requiring costly remediation and posing ongoing health risks.
Increased Repair Costs
Delaying roof leak repairs directly increases your expenses. Water damage can extend beyond the roof to walls, insulation, and possibly electrical systems, each adding to repair complexity.
Small repairs can quickly turn into large-scale restoration projects that involve a roof replacement contractor in Indianapolis. Labor and material costs rise as damage grows.
Act promptly once you spot a leak to keep repair work and costs manageable. Timely action often prevents the need for a complete roof replacement or major remodeling.
Long-Term Roof Leak Prevention and Contractor Selection
Preventative Maintenance Tips
- Inspect your roof at least twice a year and after major storms. Look for damaged shingles, rusted flashing, and clogged gutters. These are common starting points for leaks.
- Clear debris from valleys and drains to keep water flowing freely. Trim back overhanging branches that could damage roofing materials.
- Address small issues immediately. For instance, replace missing shingles or reseal flashing to prevent minor problems from escalating.
- Maintain attic ventilation and insulation. Proper airflow reduces moisture buildup that can weaken the roofing structure over time.
- Use roof coatings or sealants where recommended to add an extra layer of protection against water infiltration.
Choosing the Right Roofing Contractor
Select a roofing company in Indianapolis with verifiable experience and positive customer reviews. Check their licenses, insurance, and warranties to protect your investment. Ask for detailed written estimates explaining the scope of work, materials, and timeline. Avoid contractors who pressure for upfront full payments.
Choose contractors who offer inspections and clear explanations about the causes of leaks and the proposed repairs. Look for those who use high-quality materials and comply with local building codes. Poor materials increase the chance of recurring leaks.
Consider local companies like Jackson Contracting, known for trustworthy service and thorough workmanship. Reliable contractors help ensure repairs withstand weather challenges for years.