How Do I Tarp a Roof in an Emergency Until Help Arrives?
When your roof is damaged and professional help isn’t immediately available, putting up an emergency tarp can protect your home from further water damage. To tarp a roof in an emergency, you need a durable vinyl tarp, secure it over the damaged area, and fasten it tightly using roofing nails, ropes, or bungee cords to prevent wind from getting underneath.
Knowing how to act quickly can save you from costly repairs later by minimizing water intrusion and protecting your interior. This temporary fix is designed to hold up until a permanent repair can be made, so safety and proper installation are key to its effectiveness.
By understanding the right materials and methods, you can confidently shield your home while waiting for roof repair services, reducing stress during a critical time.

Understanding Emergency Roof Tarping
When your roof sustains damage, quick action is essential to prevent further harm. You need to grasp what emergency roof tarping involves, why it’s critical, the situations that call for it, and what to do immediately to protect your home until professional help arrives.
Definition and Purpose
Emergency roof tarping is a temporary method of covering damaged areas of a roof with a waterproof tarp. Its main purpose is to prevent water, debris, and weather elements from entering your home. This helps minimize interior damage, such as ruined ceilings, walls, and furniture.
The tarp provides only short-term protection. It is not a permanent fix, but a critical step to limit damage until qualified roofing professionals can make lasting repairs. A properly installed tarp also helps maintain some structural integrity by keeping moisture out.
Common Scenarios Requiring a Roof Tarp
You may need to tarp your roof after storms that cause missing or broken shingles, fallen tree limbs, or punctures. Heavy rain, hail, or high winds often lead to damaged roofing material that exposes the interior to the elements.
Other scenarios include sudden roof leaks, damage from accidents, or old roofs failing unexpectedly. In any urgent case involving openings or holes, tarping is necessary to reduce the risk of water damage.
Immediate Steps to Take
First, assess safety before climbing onto your roof. If it is unsafe, do not attempt tarping yourself—wait for professionals. Meanwhile, move valuables and furniture away from the damaged area to reduce loss.
Prepare your materials: a large, waterproof tarp, staples or nails, a hammer, and sturdy rope or bungee cords. Secure the tarp over the affected section, extending well beyond the damage. Attach it tightly to prevent wind from lifting it.
Use containers to catch drips inside and document the damage with photos for insurance. These actions protect your home and set the stage for a smoother repair process.
Essential Steps for Tarping a Roof in an Emergency
Knowing how to tarp your roof quickly and correctly can prevent water damage and protect your home’s structure. You will need to prepare by prioritizing safety, gathering the right tools, placing the tarp properly, and securing it firmly to withstand wind and rain until professional repairs take place.
Safety Precautions Before You Start
Before climbing onto your roof, assess the weather conditions and wait until they calm down. Avoid working in high winds, rain, or darkness to reduce fall risk.
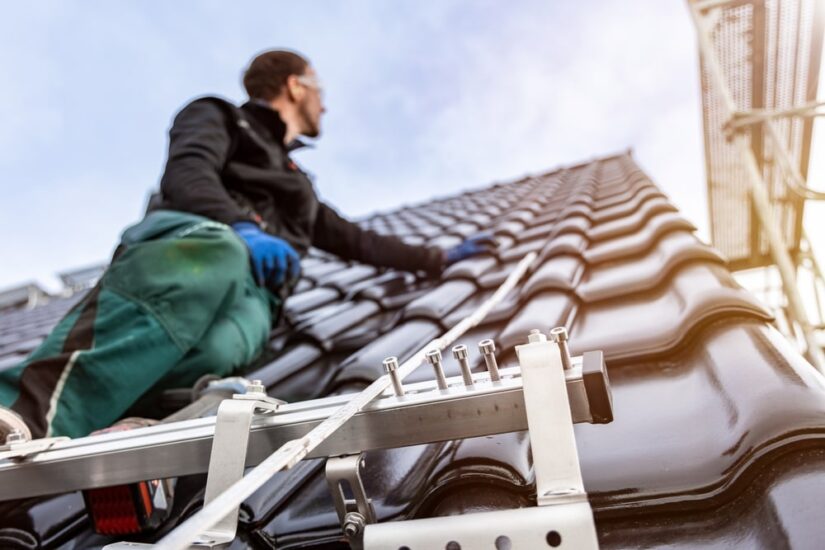
Wear proper safety gear: non-slip shoes, gloves, and a hard hat. Use a sturdy ladder placed on stable ground, and have someone assist or spot you for extra safety.
If your roof is steep or severely damaged, consider calling a professional. Never compromise your safety for a speedy repair—fall injuries are common during emergency tarping.
Gathering Necessary Tools and Materials
You will need a heavy-duty tarp large enough to cover the damaged area with extra overlap. Essential tools include:
- Rope or bungee cords
- Nails or a staple gun with roofing nails or roofing staples
- Hammer
- Utility knife or scissors
- Ladder
Optional but helpful items: gloves, duct tape, and a tarp mesh to reduce wind lift. Select a tarp made of waterproof polyethylene or similar durable material designed to withstand storms.
Proper Tarp Placement Techniques
- Position the tarp so it extends at least 3 feet beyond the damaged area toward the eaves and sides. This ensures water runoff stays clear of exposed parts.
- Lay the tarp directly on the roof surface, smoothing out wrinkles to prevent water pooling. The tarp should run from the ridge (top) to the drip edge for optimal water shedding.
- Avoid covering ventilation areas, as this can trap moisture inside the attic.
Securing the Tarp for Maximum Protection
- Anchor the tarp by nailing or stapling edges to the wooden decking underneath the shingles or secure it with heavy bricks or sandbags if nailing isn’t possible.
- Use rope or bungee cords to tie down loose edges, attaching them to secure points like gutters or anchor bolts.
- Check for tightness but avoid tearing the tarp by pulling too hard. Regularly inspect and adjust the tarp to maintain coverage against wind and rain.
- Proper fastening helps preserve your roof’s structural integrity and keeps your home dry until permanent repairs are completed.

Professional Emergency Roofing Solutions
When your roof is damaged, quick and effective action can limit further harm. Using professional services ensures your roof is tarped correctly and prepares you for the necessary next steps. Understanding specific processes and available services can help you make informed decisions.
Jackson Contracting’s Emergency Tarping Process
Jackson Contracting begins with a fast assessment of the damage to determine the most vulnerable areas. They use high-quality, weather-resistant tarps designed for temporary protection. The team secures the tarp using specialized fasteners to ensure it withstands wind and rain.
Your safety is prioritized throughout the process. Jackson Contracting’s technicians stabilize the site to avoid additional damage while working quickly. Documentation of the damage is often provided, which assists with insurance claims and repair planning. This methodical approach prevents worsening damage until permanent repairs can be scheduled. If the damage is extensive, then you can visit their roof replacement services page for information about replacing your roof.
Benefits of Hiring Experienced Contractors
Choosing experienced contractors like Jackson Contracting minimizes the risk of improper installation, which can lead to more damage or tarp failure. Their professionals have the right tools and knowledge to seal your roof securely against various weather conditions.
You also receive guidance on prioritizing repairs and managing costs. Their experts can help document damage for insurance and offer advice on temporary measures. Plus, they reduce the time your home is exposed to elements, limiting potential harm to your interior and structure.
Additional Roofing Services Available
Besides emergency tarping, Jackson Contracting offers roof inspection, debris removal, and full roof replacement. They provide detailed assessments to determine the extent of damage and recommend the best permanent solutions.
If immediate repair is not possible, they help schedule follow-up work, including shingle replacement or structural reinforcement. These services ensure your roof returns to its full protective function quickly and efficiently. This comprehensive approach saves you from piecemeal solutions and future costs. So, visit their homepage to learn more about the various services they offer.
